
Sherpa combines its in-house design services with onsite manufacturing to enable faster product development cycles and produce exceptional parts for their customers.

Two teams of engineers at Sherpa were tasked with designing, producing, procuring and assembling a bike for the office that employees can use around town.
After we developed the KONE, Able Brewing returned to have us create a high-quality reusable stainless-steel filter basket that would fit 80% of the coffee makers on ...
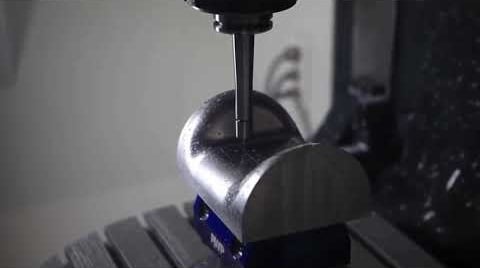
We needed to hard-mill some complex-shaped steel tooling after heat treat and so we added check grooves to the inspection surfaces.

Video guide on performing an IPX7 water resistance test for consumer products.
We recently took possession of the latest 3D Printer from Carbon, the M3 Max. Here we are running a test on some complex lattice designs with incredible performance ...
Gevenalle asked Sherpa to improve their shifter conversion kits. We developed a custom work holding to machine the off-axis holes that are in every ...
We designed a bike saddle in NX CAD and using Carbon Design Engine, we defined regions with different lattice parameters and 3D printed the saddle cushion with ...
Selection Priority within NX determines what gets selected and what the order of priority of that selection is for your tool.
In this video we look at two options for making adjustments at an early point in the feature tree. Edit by Rollback vs Edit Parameters.

In this video we look at two options for making adjustments at an early point in the feature tree. Edit by Rollback vs Edit Parameters.
.jpg)
It is a long established fact that a reader will be distracted.
Additive Manufacturing with Carbon
“Having design services and manufacturing in house lets us stay on top of product development and really speeds things up. Sherpa design is a full-service engineering and design firm located in Portland Oregon. We offer mechanical engineering, industrial design as well as manufacturing. We work on all kinds of products from bike saddles to headset replacement parts and then we use Carbon 3D printers to support those design and engineering efforts. The Carbon printers are very consistent. They can do detail really well, even from multiple axis. Currently we have three M2 printers, one brand new M3 Max, and the Carbon Smart Part Washer. Everything in our company is design focused, even our 3D printing department, and we take advantage of the design skills our company has to ensure that we’re getting the best parts possible."
Connor Shimamoto – Additive Manufacturing Application Specialist – Sherpa Design
Bike Challenge Documentary
This year Sherpa embarked on an exercise in team building in the form of an engineering constructor challenge. Two teams of engineers at Sherpa were tasked with designing, producing, procuring, and assembling a bike for the office that employees can ride around town. Each team was given a different theme for their bike design: Everest and Moab. The teams were each given an antiquated mountain bike frame and about 16 weeks to work together on design and manufacturing. They were challenged to create custom features, work within a small budget, and partner with Sherpa’s 3D printing department and CNC machine shop for producing their components. Both teams were expected to work in NX CAD or SolidWorks, manage their projects in our Teamcenter environment, create a BOM, and track all expenses.
Designing the Perfect Coffee Filter
The Able Brewing Story: Keith Gehrke, co-owner of local Portland coffee shop, Coava, was home one morning attempting to brew with his manual drip Chemex Coffee Maker when he realized he was out of paper filters. So began the hunt for reusable filters, a hunt that ultimately led to the design of the KONE coffee filter. Keith partnered with Sherpa Design to create this successful consumer product. The business evolved (now called Able Brewing) and many years later they turned again to Sherpa for their consumer product design. This time the goal was to expand the filter line, creating reusable stainless-steel filters that would bring that amazing flavor to the rest of the coffee makers on the market. The Basket: The first new product was a flat-bottom filter basket that will work as a reusable filter in 80% of the coffee makers on the market.
5 axis DMU 50 at work
We needed to hard-mill some complex-shaped steel tooling after heat treat and so we added check grooves to the inspection surfaces. Our 5-axis DMU-50 did a great job machining this component of a larger inspection fixture assembly for a global manufacturer of mining and construction equipment.
https://sherpa-design.com/capabilities/manufacturing/
Performing a water resistance test for consumer products.
IP67 is a common a common rating for consumer product devices. The IP stands for Ingress Protection and the first number refers to particle while the second number refers to moisture. Specific to water resistance the particle is often skipped and the rating is referred to as IPX7. In this case, seven means, “one meter underwater for 30 minutes of time.” Compared to some of the lower standards that are built around rainwater and directional splashing, this one focuses on submersion. The product must survive functionally and, as a general standard, not have any water get inside of the device. Watch this simple guide to performing the test. Steps in the IPX7 Water Column test 1. Take a one-meter column and fill with water. 2. Sink the device being tested to the bottom of the column. 3. Leave it there for half an hour. 4. Take it out and inspect to see if it's still functional. 5. Examine to see if it has any water inside. In this case, I found indications that water got in, but that doesn't necessarily fail this product. They may have designed it so that this battery compartment can get wet, and that the main electronics cannot. This is a decision to be made by the developer. This battery portion of the device was not developed to be waterproof, as there is no sealing mechanism that would stop water from pushing through. One of the big differences between the lower IPs rain or splash resistance verses submersion is pressure. When you have a raindrop or spray, there's not a lot of pressure on the seals, but as soon as you get immersion, the seal point has a lot of pressure on it.
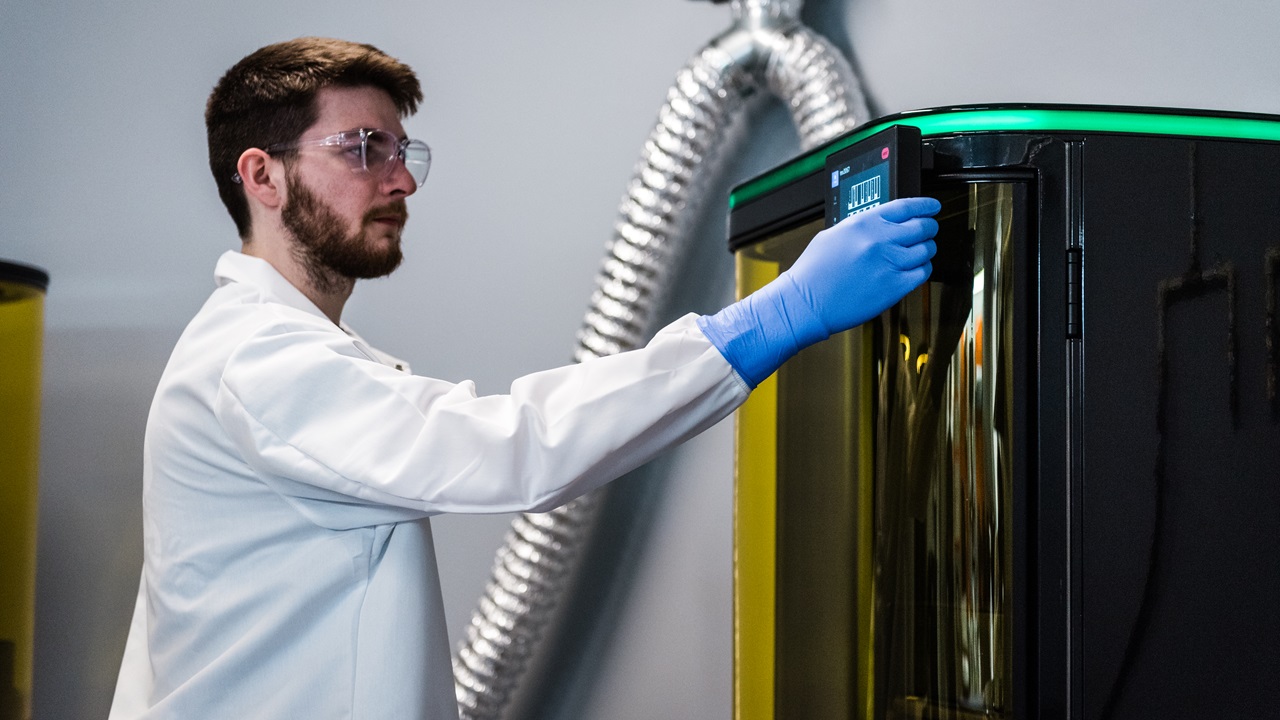
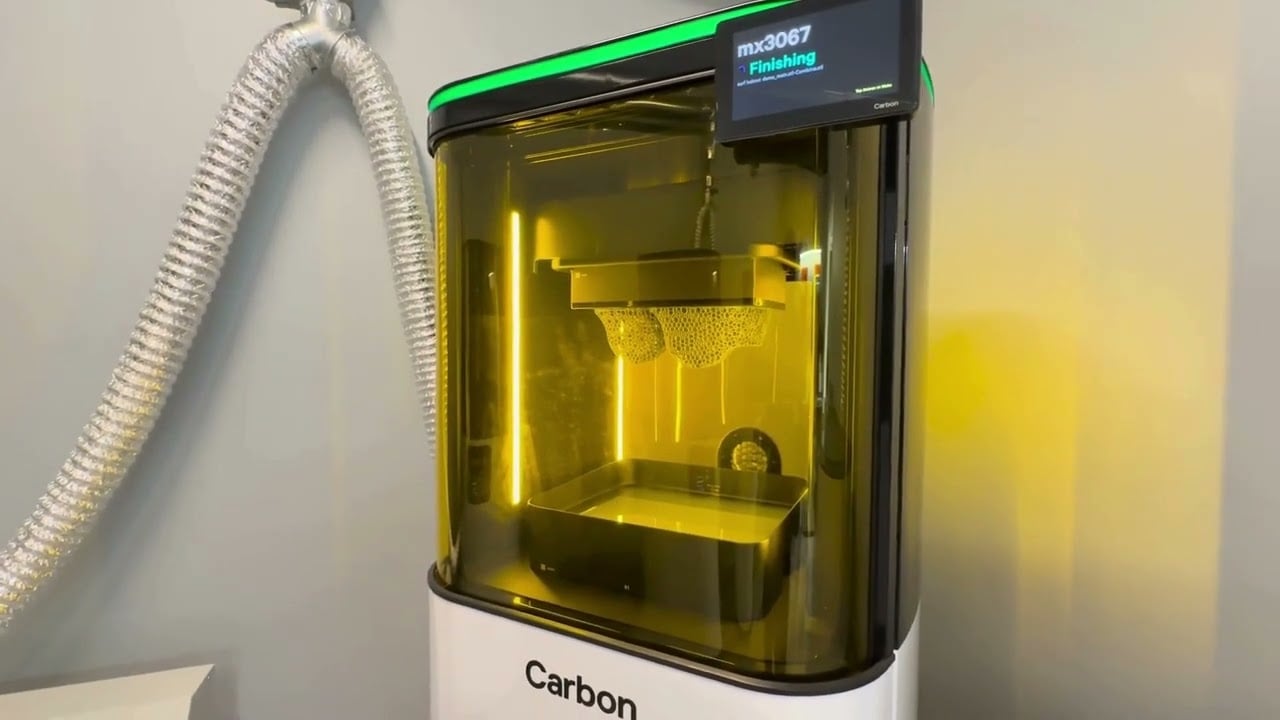
Testing the new Carbon M3 Max
This month we took possession of the latest 3D Printer from Carbon, the M3 Max. The M3 brings several benefits to our workflow including: - Self-Installable. The self-installation allowed for a faster start up and flexibility to move the machine around our lab as needed. - Force feedback and IR-based resin heating. This improves surface finish, speed, and our ability to resolve delicate features. - Increased build volume. With a platform over twice the area of our M2s, we’ll be able to print larger geometries and consolidate parts while using the same resolution. Build volume 307mm x 163mm x 305mm. Here we are running a test on some complex complex lattice designs with incredible performance properties. https://sherpa-design.com/capabilities/3d-printing/
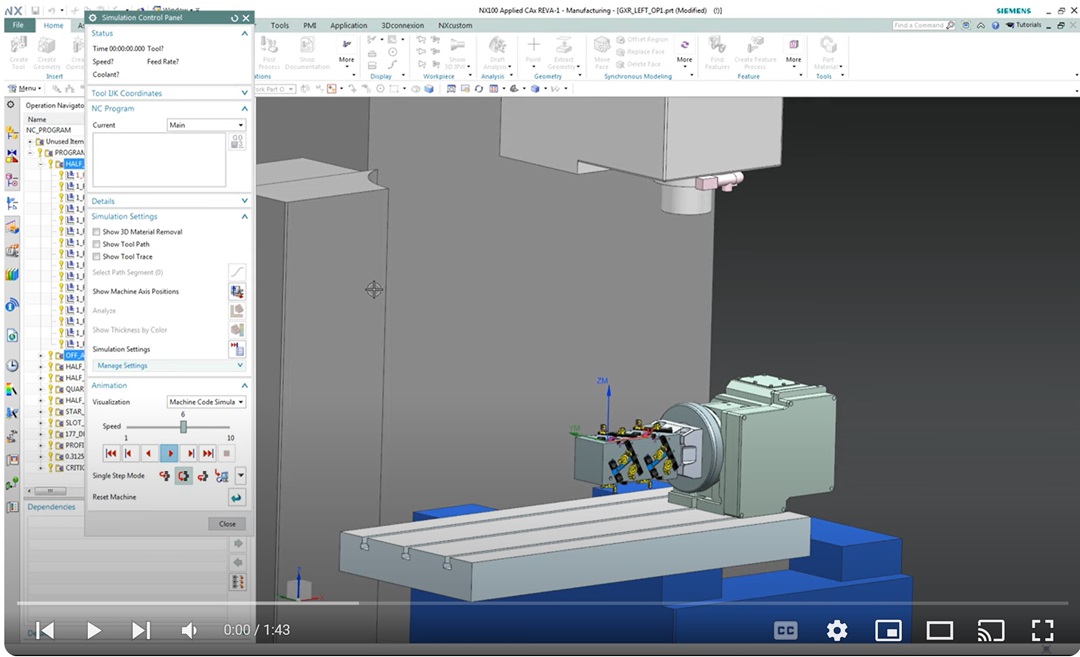
Gevenalle Off Axis Drilling
Gevenalle asked Sherpa Design to improve their shifter conversion kits. One machining challenge arose when we attempted to create an off-angle hole in the shifters with our 4th axis machine. Sherpa developed custom work holding to hold multiple parts at once to maximize machine throughput. Creating an entirely new setup for each off-angle hole was time-consuming and carried the risk of misalignment. This could result in scrapped parts. Sherpa's NX CAM Machine Shop team explored innovative approaches for the production phase to resolve this issue. This video is showing the machining simulation (test run) of how we used a 4th axis rotary to machine the off-axis holes that are in every part, right and left-handed versions of shifters.
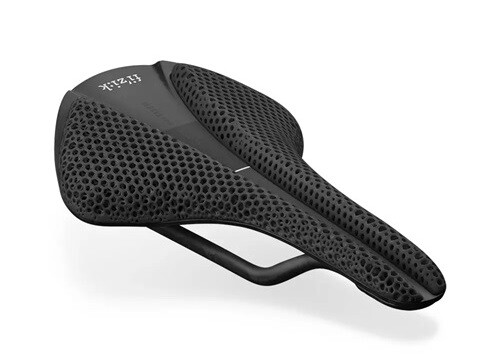
Carbon 3D Printing a Bike Saddle and Grips
Here we 3D scanned the rigid plastic shell of a bike saddle and took the scan data into NX reverse engineering to create a bike saddle model that looks and functions well. Using Carbon Design Engine, we defined regions with different lattice parameters for optimal comfort and support. We prepared it for 3D printing by adding skins and perforated textures for ease of cleaning and handling. In this case, we printed the saddle cushion with matching handlebar grips.
NX CAD Tips and Tricks - Top Selection Priority
Selection Priority within NX determines what gets selected and what the order of priority of that selection is for your tool. When selecting an edge NX's default selection is "feature" - so when you highlight an object it will highlight and entire extrude. If you want to grab and edge you could use your quick pick, but another way is to change the top selection priority. You can change to edge for example and that will let you grab and edge of a part much easier. There are also hotkeys to make these changes. Watch this video for a quick walkthrough on this shortcut.
NX CAD Tips and Tricks - Edit by Rollback vs Edit Parameters
In this video we look at two options for making adjustments at and early point in the feature tree. Edit by Rollback vs Edit Parameters Both options let you make an adjustment at the start of a project, but one will hide the other levels and the other lets you see the impact on the final output. Edit with rollback lets you click on the place you first created an extrude and the other features are deemphasized as you are rolled back in time. You can then make a change here as if you were first creating this feature and it will carry forward. Edit Parameter's does the same without deemphasizing the other features so you can see the impact of your change on the finished part.
NX CAD Tips and Tricks - User Roles
This video goes into how to create your own role, how to save that role and a little bit about why that is important to do for your NX environment.
Roles are configurations of the user interface that allow us to show and hide specific commands as well as save them in different locations. We can create various NX environments using roles that encourage efficient workflows for different applications.
Learn more and take our online class at https://nx-cad-foundation.teachable.com/p/home